Part 2 of our guide to using PyQt5 in Excel
You often need to get small amounts of input, or offer a choice among a number of alternatives. Qt, like all GUI systems, offers you a choice of graphical elements collectively known as widgets. In this post we introduce you to the high-level QDialog widget, and some of the simpler input widgets.
Building GUIs for Excel need not be painful. It is quite simple to hook up a few widgets inside a QDialog to get the input you need.
Meet the QDialog
If you’ve already read Extending the Excel User Interface you are already familiar with a subclass of QDialog. The QMessageBox used in the last blog entry is one of QDialog’s simpler derivative classes. There’s a fuller introduction to the QDialog in this tutorial.
By extending (inheriting from) QDialog it’s simple to create your own dialogues with various input widgets and standard buttons. The widgets go into a layout object. Once complete you set that as the QDialog’s layout and your dialog is ready for action.
The simplest way of establishing a layout uses the QHBoxLayout and the QVBoxLayout objects to position a sequence of widgets together either next to each other or above one another respectively. Since the layout boxes are themselves widgets they can be placed inside other groupings.
To avoid problems of parallelization it is by far simplest to use modal dialogues, where all other program activity is suspended until the dialogue is dismissed. That way you know that Excel won’t be changing things while the dialogue is being processed. QDialogs are modal by default.
Desired Layout
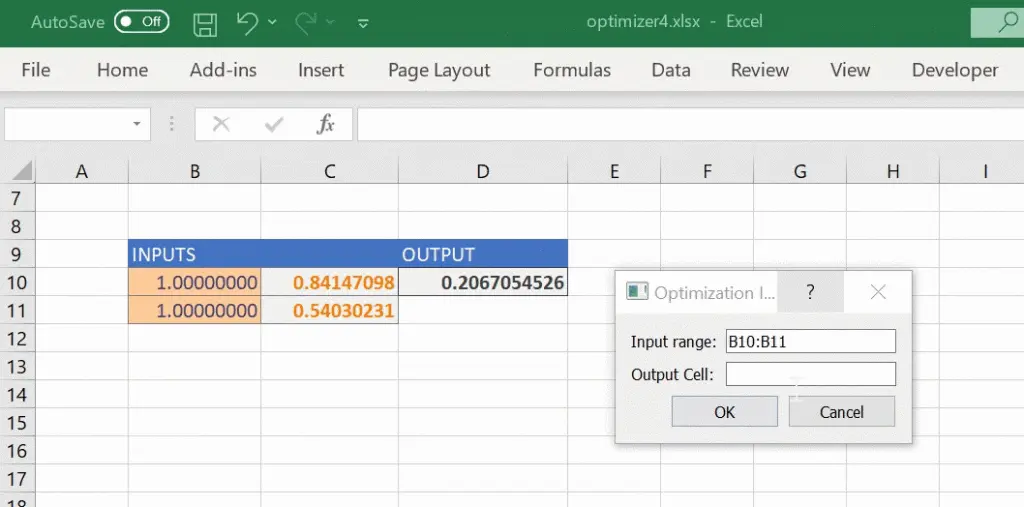
In the case of the optimization, we need to ask for a range of input cells and an output cell. A straightforward way to do this is to have two rows (QHLayoutBoxes) each containing a label (a QLabel widget) and an input box (a QTextEdit widget), inside a QVLayoutBox. You can conceptualise it something like this:
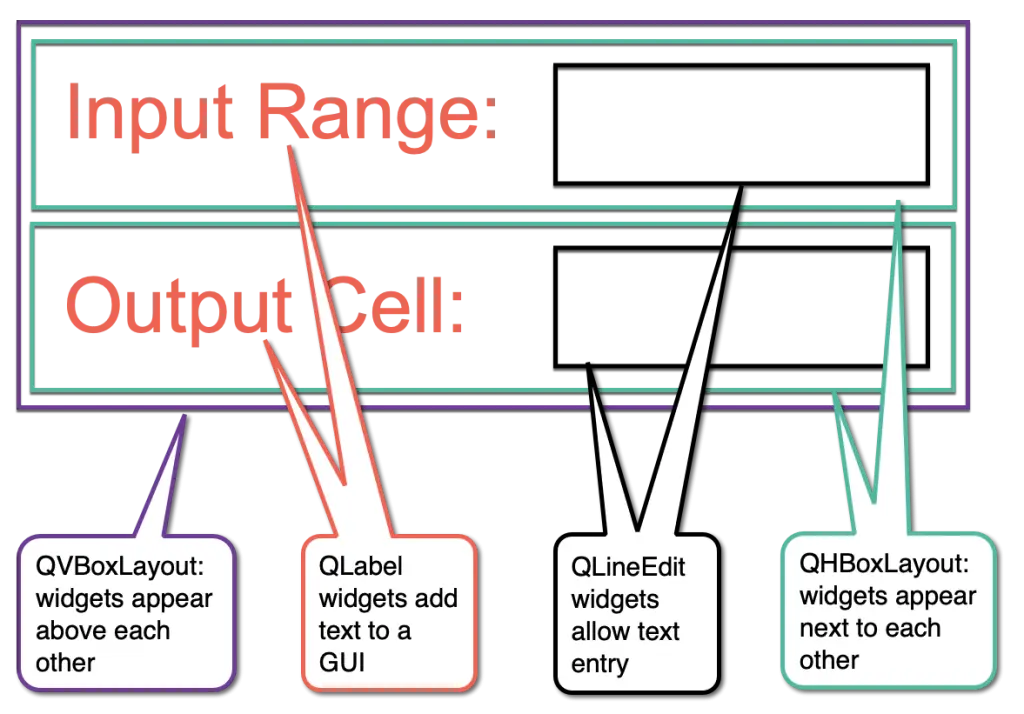
QHBoxLayouts (green), each of which contains a QLabel (red) and a QLineEdit (black).
Here is a first attempt at a class definition to implement this interface in a standalone program. I’ve used my standard strategy of creating the widgets first and then adding the widgets to the layouts. I’ve missed out the imports and the get_qt_app function. The whole program is qt_ex2.py in the repository.
class OpDialog(QDialog):
"A Dialog to set input and output ranges for an optimization."
def __init__(self, *args, **kwargs):
"Create a new dialogue instance."
super().__init__(*args, **kwargs)
self.setWindowTitle("Optimization Inputs and Output")
self.gui_init()
def gui_init(self):
"Create and establish the widget layout."
self.in_range = QLineEdit()
self.out_cell = QLineEdit()
row_1 = QHBoxLayout()
row_1.addWidget(QLabel("Input range:"))
row_1.addWidget(self.in_range)
row_2 = QHBoxLayout()
row_2.addWidget(QLabel("Output Cell:"))
row_2.addWidget(self.out_cell)
layout = QVBoxLayout()
layout.addLayout(row_1)
layout.addLayout(row_2)
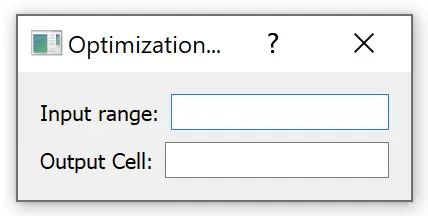
self.setLayout(layout)
This displays a window that looks like this:
Stretch goals
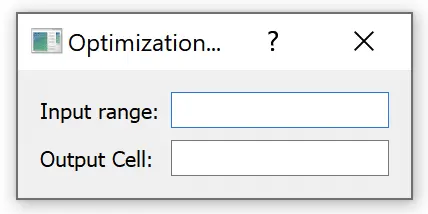
Note that the QLineEdit widgets are displayed at different widths. This is because layouts by default try to fill their space with the widgets. You can add “stretch” to a layout, and that will take up the slack and allow visible widgets to adopt this natural length. The qt_ex3.py program changes the QHBoxLayout creation code by inserting calls to their addStretch method.
        row_1 = QHBoxLayout()
        row_1.addWidget(QLabel("Input range:"))
        row_1.addStretch()
        row_1.addWidget(self.in_range)

        row_2 = QHBoxLayout()
        row_2.addWidget(QLabel("Output Cell:"))
        row_2.addStretch()
        row_2.addWidget(self.out_cell)
These small differences can make the difference in people’s perception of an interface, so it’s worth paying attention to them if you aren’t going to be the only user. The updated dialogue box looks like this.
Buttoning it down
The dialogue layout looks good, but the user has no way to indicate that they have finished entry! Another nice feature of the QDialog is that you can add most of the standard buttons in a neat QDialogButtonBox widget, whose argument is a set of flags selecting the required buttons. Using this widget also helps you to conform with UI guidelines for the Windows platform (and others, if you use them).
The QDialog has a number of standard methods, including accept and reject, used to indicate whether the QDialog was dismissed with (e.g.) the OK or the Cancel button. If the former then the QDialog’s exec_ method returns True, otherwise False. These need to be wired to the signals raised by clicking the buttons.
The code to add the buttons and connect the to the appropriate methods is shown below (new lines are highlighted, and the complete program is included as op_dialog.py in the repository).
        row_3 = QHBoxLayout()
        self.buttonBox = QDialogButtonBox(QDialogButtonBox.Ok | QDialogButtonBox.Cancel)
        self.buttonBox.accepted.connect(self.accept)
        self.buttonBox.rejected.connect(self.reject)
        row_3.addWidget(self.buttonBox)

        self.layout = QVBoxLayout()
        self.layout.addWidget(self.buttonBox)

        layout = QVBoxLayout()
        layout.addLayout(row_1)
        layout.addLayout(row_2)
        layout.addLayout(row_3)
        self.setLayout(layout)
You can determine whether the user pressed”Cancel” or “OK” by examining the result of the QDialog’s exec_ method, and read the values from the QLineEdit items once exec_ has returned. The updated main program’s code reflects this.
if __name__ == "__main__":
    app = get_qt_app()
    msgBox = OpDialog()
    result = msgBox.exec_()
    print("Input range:", msgBox.in_range.text())
    print("Output cell:", msgBox.out_cell.text())
    print("You clicked", "OK" if result else "Cancel")
Updating the optimizer
At this point you have built the dialogue you need as a class. The main program does not run when the module is imported. Other modules can therefore import and use the dialogue instead of copying and pasting. Sharing is so much easier in Python than in VBA – now all your workbooks can use this dialogue!
Because the inputs are expected to be cell and range references, I’ve added a small verifier function to validate the inputs. A simple strategy tries to return an Excel range. Any exceptions must be caused by “bad” user input.
def get_range(s):
    try:
        return xl.Range(s)
    except Exception as e:
        raise ValueError("Range specification not acceptable")
The logic of the optimizer function is changed so that it obtains the input and output ranges from the dialogue box rather than using fixed references. Otherwise the code remains essentially the same.
@xl_menu("Optimize5")
def optimize5():
    """
    Trigger optimization of a spreadsheet model that
    takes the named range "Inputs" as inputs and
    produces output in the named range "Output".
    """
    xl = xl_app()
    qt_app = get_qt_app()  # pragma noqc
    # Get the initial values of the input cells
    msgBox = OpDialog()
    result = msgBox.exec_()
    if not result:  # user cancelled
        return
    in_range = get_range(msgBox.in_range.text())
    out_cell = get_range(msgBox.out_cell.text())
    in_values = list(in_range.Value)
    X = np.array([x[0] for x in in_values])

    orig_calc_mode = xl.Calculation
    try:
        # switch Excel to manual calculation
        # and disable screen updating
        xl.Calculation = constants.xlManual
        xl.ScreenUpdating = False

        # run the minimization routine
        xl_obj_func = partial(obj_func, in_range, out_cell, xl)
        result = minimize(xl_obj_func, X, method="nelder-mead")
        xl.ScreenUpdating = True
        mbox = QMessageBox()
        mbox.setIcon(QMessageBox.Information)
        mbox.setText("Optimization results shown below." "\nMake changes permanent?")
        mbox.setWindowTitle("Optimization Complete")
        mbox.setInformativeText(
            "\n".join(
                [
                    "Successful:       %s" % result.success,
                    result.message,
                    "After %d iterations" % result.nit,
                ]
            )
        )
        mbox.setStandardButtons(QMessageBox.Ok | QMessageBox.Cancel)
        yes_no = mbox.exec_()
        if yes_no != QMessageBox.Ok:
            in_range.Value = in_values
        else:
            in_range.Value = [(float(x),) for x in result.x]

    finally:
        # restore the original calculation
        # and screen updating mode
        xl.ScreenUpdating = True
        xl.Calculation = orig_calc_mode
Now when you select “Optimize5” from the PyXLL menu the dialogue box asks you for the input range and the output cell for the model. These are also passed in to the objective function by extending the functools.partial argument list.