Introduction
Note: This tutorial requires PyXLL, the Python Excel Add-In, >= 4.0 and Excel >= 2010.
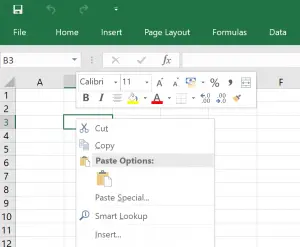
Context, or shortcut, menus in Excel are one of the most commonly used user interface features of Excel. The most well know context menu is the cells menu. When you right click on a worksheet cell or selection you’re presented with a menu with a range of options for copy and pasting, cell formatting and other functions.
This post shows how to customize these context menus with using PyXLL, the Python Excel Add-In, in versions of Excel from 2010 onward (including Office 365).
PyXLL embeds Python in Excel, allowing you to write fully-featured Excel add-ins and replace VBA with Python.
Adding a Button to the Cells Menu
Context menus are customized using the ribbon xml file specified in the pyxll.cfg config file. See Customizing the Ribbon in the PyXLL user guide for more details about configuring the ribbon.xml file.
If you’ve not already installed PyXLL, see the Introduction to get started.
Note: Customizing the context menus using the ribbon.xml file is only possible in Excel 2010 and later versions (including Office 365). For that reason, the following will not work with Excel 2007 or earlier versions.
The xml below shows how to add a button and a sub-menu containing some more buttons to the Excel Cells context menu. Copy and paste this code and save it to a file named ribbon.xml and add it to your pyxll.cfg file as follows:
[PYXLL]
ribbon = <path to ribbon.xml>
<?xml version="1.0" encoding="UTF-8"?>
<customUI xmlns="http://schemas.microsoft.com/office/2009/07/customui">
<ribbon>
<!-- The ribbon and context menus are specified in the same file -->
</ribbon>
<contextMenus>
<contextMenu idMso="ContextMenuCell">
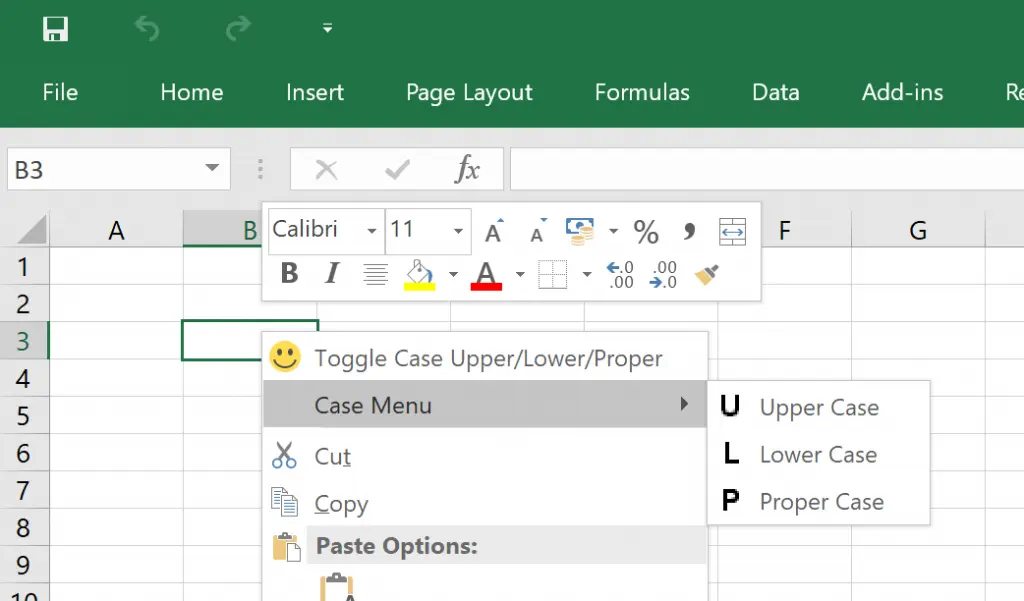
<button id="MyButton" label="Toggle Case Upper/Lower/Proper"
insertBeforeMso="Cut"
onAction="context_menus.toggle_case"
imageMso="HappyFace"/>
<menu id="MySubMenu" label="Case Menu" insertBeforeMso="Cut">
<button id="Menu1Button1" label="Upper Case"
imageMso="U"
onAction="context_menus.toupper"/>
<button id="Menu1Button2" label="Lower Case"
imageMso="L"
onAction="context_menus.tolower"/>
<button id="Menu1Button3" label="Proper Case"
imageMso="P"
onAction="context_menus.toproper"/>
</menu>
</contextMenu>
</contextMenus>
</customUI>
Note: The “http://schemas.microsoft.com/office/2009/07/customui” schema is important, and is different from the schema used in the example ribbon.xml file found in the PYXLL examples. Without this your context menus won’t appear.
Once you’ve configured PyXLL with this ribbon.xml file, when you reload PyXLL or restart Excel you’ll see those menus added to the cells context menu.
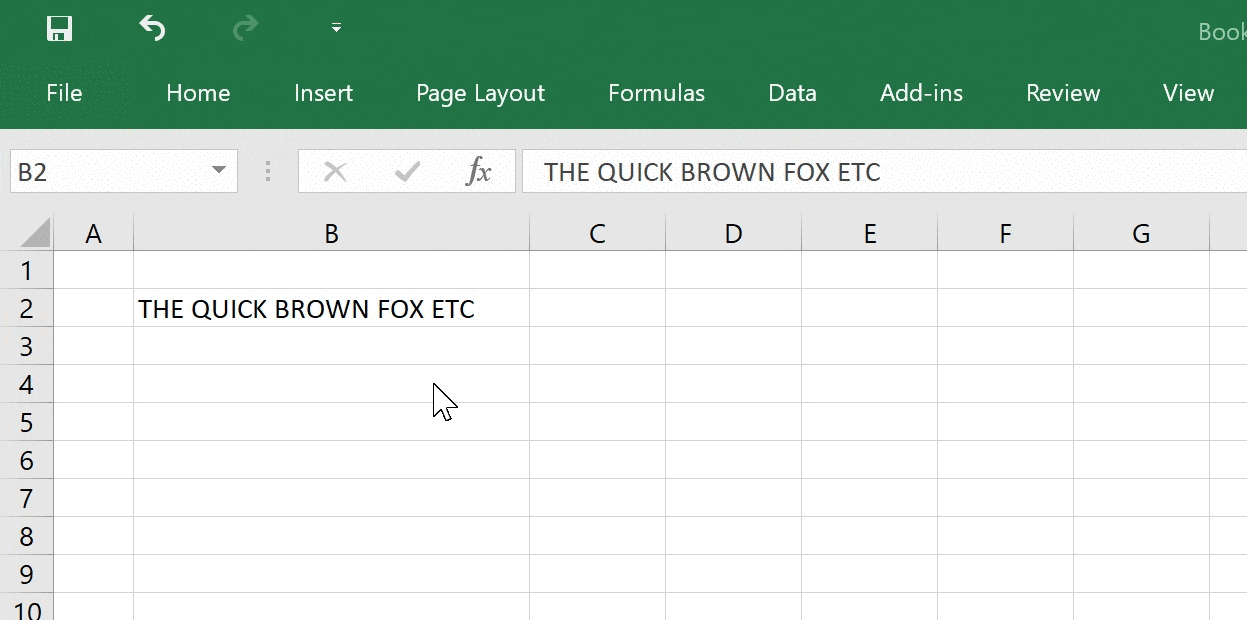
If you try selecting any of the newly added menu items, nothing happens! That’s because the Python functions that the menu items reference haven’t been written yet.
On each menu item you’ll see an onAction tag. The value of those is the Python function that should be called when the menu item is selected. We need a new module called “context_menus.py” where we can write those functions. The module name isn’t important as long as it matches the xml, but we’ve used “context_menus” in the xml above.
from pyxll import xl_app


def toggle_case(control):
    """Toggle the case of the currently selected cells"""
    # get the Excel Application object
    xl = xl_app()

    # iterate over the currently selected cells
    for cell in xl.Selection:
        # get the cell value
        value = cell.Value

        # skip any cells that don't contain text
        if not isinstance(value, str):
            continue

        # toggle between upper, lower and proper case
        if value.isupper():
            value = value.lower()
        elif value.islower():
            value = value.title()
        else:
            value = value.upper()

        # set the modified value on the cell
        cell.Value = value


def tolower(control):
    """Set the currently selected cells to lower case"""
    # get the Excel Application object
    xl = xl_app()

    # iterate over the currently selected cells
    for cell in xl.Selection:
        # get the cell value
        value = cell.Value

        # skip any cells that don't contain text
        if not isinstance(value, str):
            continue

        cell.Value = value.lower()

def toupper(control):
    """Set the currently selected cells to upper case"""
    # get the Excel Application object
    xl = xl_app()

    # iterate over the currently selected cells
    for cell in xl.Selection:
        # get the cell value
        value = cell.Value

        # skip any cells that don't contain text
        if not isinstance(value, str):
            continue

        cell.Value = value.upper()


def toproper(control):
    """Set the currently selected cells to 'proper' case"""
    # get the Excel Application object
    xl = xl_app()

    # iterate over the currently selected cells
    for cell in xl.Selection:
        # get the cell value
        value = cell.Value

        # skip any cells that don't contain text
        if not isinstance(value, str):
            continue

        cell.Value = value.title()
The “Excel.Application” object returned by “pyxll.xl_app()” is exactly the same as the Application object in VBA. It’s part of the Excel Object Model, and is exactly the same in Python as it is in VBA. Therefore, you can use it to automate Excel and do everything that you would previously have done using VBA.
Make sure this new module is on the Python path in your pyxll.cfg file, and add it to the list of modules.
[PYXLL]
ribbon = ribbon.xml
modules =
    context_menus

[PYTHON]
pythonpath =
    <path to your Python code>
Dynamic Menus
Rather than specify the items in a menu statically in the xml file, it’s possible to specify a function for Excel to call to get the menu items at run-time.
Instead of the “contextMenu” element, a “dynamicMenu” element is used instead:
<?xml version="1.0" encoding="UTF-8"?>
<customUI xmlns="http://schemas.microsoft.com/office/2009/07/customui">
    <ribbon>
        <!-- The ribbon and context menus can be specified in the same file -->
    </ribbon>
    <contextMenus>
        <contextMenu idMso="ContextMenuCell">
            <dynamicMenu id="MyDynamicMenu"
                label= "My Dynamic Menu"
                imageMso="ChangeCase"
                insertBeforeMso="Cut"
                getContent="context_menus.dynamic_menu"/>
        </contextMenu>
   </contextMenus>
</customUI>
The “getContent” tag specifies the Python function to call to get the contents of the menu. The function returns an xml fragment that will be used to construct the menu.
def dynamic_menu(control):
    """Return an xml fragment for the dynamic menu"""
    xml = """
         <menu xmlns="http://schemas.microsoft.com/office/2009/07/customui">
            <button id="Menu2Button1" label="Upper Case"
                imageMso="U"
                onAction="context_menus.toupper"/>

            <button id="Menu2Button2" label="Lower Case"
                imageMso="L"
                onAction="context_menus.tolower"/>

            <button id="Menu2Button3" label="Proper Case"
                imageMso="P"
                onAction="context_menus.toproper"/>
         </menu>
    """
    return xml
The code above should go in the “context_menus” module as in the previous section. Rather than using a simple string as above, any of the Python xml packages could be used to generate the menu programmatically.
For more details about the dynamicMenu element see the Microsoft documentation 2.2.19 dynamicMenu (Dynamic Menu).
Other Menu Controls
As well as buttons, used in the previous sections, other controls are available to use in context menus. The available control types are:
- control
- button
- checkBox
- dynamicMenu
- gallery
- menu
- menuSeparator
- splitButton
- toggleButton
For details of each control type, see the Microsoft Ribbon documentation 2.2 Elements.
Resources
- Source code for this post
- PyXLL, The Python Excel Add-In
- Custom context menus in the PyXLL user guide
- Microsoft RibbonX Documentation
- Custom context menus in VBA tutorial
- List of imageMSOs